Textures on parts
|
|
|
|
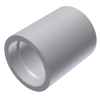
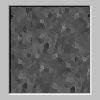
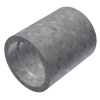
You can use part textures to more accurately represent the real appearance of a given part material or part surface.
Using textures you define
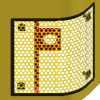
Autodesk Inventor has a library of surface textures. You can also define, store, and apply your own textures. A texture that you define can be useful to represent a series of holes or slots in a part, for example, but there is no need to model each hole or slot for manufacturing or analysis purposes. For example, for a part such as a grill or a screen, it may be more convenient or economical to represent each hole or slot as a texture rather than a modeled feature. To that end, you can create textures with transparent pixels so that a part displays as transparent wherever those transparent pixels appear.
Defining your own textures gives you the flexibility to customize the texture color, pattern, and size precisely. You can also adjust the texture map pixel measurement and dpi resolution to create texture patterns that match the scale of the parts to which the textures are applied.
Understanding texture color and part color combinations
When applying a texture to a part, keep in mind that the texture color combined with the part color displays as the product of those colors. For example, a texture with a color that is primarily a dark gray will, when combined with a part color which is a light blue, display as a darker blue, relative to those two shades. Combining a texture with a color that is primarily red with a part color of green displays as black, as if you viewed a red object through a green filter.
If you want the texture color to display on the part with exact fidelity to the texture color as it appears in the preview window of the Texture Chooser dialog box, set the part color to white. Set each color property in the Colors field, on the Color tab, of the Colors dialog box to White. Then apply a texture.
Apply textures to parts
|
|
| You can use part textures to more accurately represent real material textures, finishes, and patterns. |
Apply a texture to a part
- On the ribbon, click Manage tab
 Styles and Standards panel
  Styles Editor .
 - In the Styles Editor browser pane, click Color and select a color to edit.
- In the Color pane, click Choose to open the Texture Chooser dialog box.
- In the Texture Chooser dialog box, select a texture.
- Adjust the Tiling Preview slider from 1 to 5 to check the tiling accuracy of the texture. It is particularly useful when you must examine the accuracy of the alignment of repeat patterns along the edges of tiled textures that you defined.
- Click OK to close the Texture Chooser dialog box.
- Use the %Scale slider to adjust the texture scale.
- Use the Rotation slider to adjust the texture rotation.
- Click Done to close the Styles Editor. The changes to the style are only applicable in the current file.
Note: The Tiling Preview Slider does not modify the texture scale.
Remove a texture from a part
- On the ribbon, click Manage tab
 Styles and Standards panel
  Styles Editor .
 - In the Styles Editor browser pane, click Color and select a color to edit.
- In the Texture box, click Remove.
- Click Done to close the Styles Editor. The changes to the style are only applicable in the current file.
Set the part color to white
The texture color combines with the part color to produce the product of those colors. To have the applied texture color match the color of the texture as displayed in the preview window of the Texture Chooser dialog box, set the underlying color to white.
- On the ribbon, click Manage tab
 Styles and Standards panel
  Styles Editor .
 - In the Styles Editor browser pane, click Color and select a color to edit.
- In the Colors box, click Diffuse.
- In the Color dialog box select White and click OK.
- Repeat this step for Emissive, Specular, and Ambient.
- Click Done to close the Styles Editor. The changes to the style are only applicable in the current file.
Create and apply custom textures
|
| In addition to the Autodesk Inventor default texture library, you can create your own library of textures. To create a texture map, use any image editor that creates a file in one of these formats: .bmp, .gif, .jpg or .jpeg, .png, or .tiff. |
Create a texture
Note: The following procedure creates a texture map with a pixel measurement as an approximate average of the texture maps contained in the default Autodesk Inventor texture library. You can use any pixel dimension.
- Create a file that is 96 pixels square.
- Create the desired texture.
- Save the completed texture as a .bmp format in a folder that is part of the current Autodesk Inventor project such as a project workspace, a local directory, a workgroup, or a shared library location.
Create textures with transparent pixels
You can create textures with pixels that Autodesk Inventor interprets as transparent. Transparency is useful when creating such parts as a perforated grill or screen.
You do not have to use image-editing software capable of creating transparent pixels. Autodesk Inventor uses a file name convention and bitmap interpretation scheme that indicates a specified color within the image is to be treated as transparent.
- Create a file 97 pixels square. When creating a texture map containing pixels which is transparent, use an overall size 1 pixel larger than the intended image size.
- Create the texture pattern or texture map. Use a specific color to indicate where transparency is appropriate.
- Apply the specific color to the bottom rightmost pixel. Autodesk Inventor applies transparency to any pixel that matches the color of the lower right pixel. The bottom row of pixels and the right column of pixels are not interpreted as part of the image.
- Save the completed texture with a .bmp extension into the desired Autodesk Inventor project directory.
Note: The ampersand (&) can also be created by using its numeric code. Hold down the ALT key and on the numeric keypad type 038.
Apply a custom texture to a part
- In Autodesk Inventor, select Manage tab
 Styles and Standards panel
  Styles Editor .
 - In the Styles Editor browser pane, click Color and select a color to edit.
- In the Colors pane, click Choose to open the Texture Chooser dialog box.
- In the Texture Library box, select one of the names in the Project Library window.
- Select a texture, and then click OK.
- Click Done to close the Styles Editor. The changes to the style are only applicable in the current file.
Guidelines for custom textures
- Design the texture map so the pattern at the sides of the image aligns accurately when the texture map is tiled.
- To ensure that the texture map is included in a Pack and Go operation, save the texture map into a project directory of the parts to which the texture is associated.
- When creating a texture that contains transparency, remember to specify the image width and height as 1 pixel larger than the actual texture size.
- Use the texture map image resolution to vary the scale of the tile repetitions. A texture map 96 pixels square with a resolution of 150 dpi tiles on a given part at half the scale of a texture map 96 pixels square at 75 dpi.
Use this method to approximate or match the relative scale of the part to which the texture is applied. For example, use a low dpi to represent the rivet pattern on the hull of a ship or a high dpi to represent an integrated circuit.
- Use any image source to create a texture map. In addition to creating an image in an image editor, you can scan artwork, an image or item, and then apply the data to the texture map.
Assign custom textures to styles in shared environments
|
| You can store custom texture .bmp files in the Styles library. In a shared environment, it is recommended that the CAD administrator: |
- Create one Autodesk Inventor project file which allows styles to be edited.
- Create a second project file which provides a read-only Styles library.
- Distribute the read-only Styles library project file to the users.
Note: You can also store custom bump maps and reflection files in the surfaces library in the Autodesk Inventor Studio environment. Refer to: Working with custom bump maps and reflection files in a shared environment.
Example
Note: The CAD administrator performs these tasks.
Step 1: Create a project file specifically for editing and defining styles.
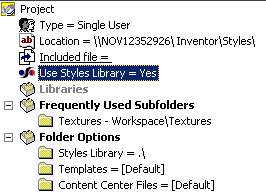
- Specify the location of the styles library on a shared network folder. For example: [shared network folder]:\Inventor\Styles\.
Next, create a subfolder named Textures.
- In the Project Editor, under Frequently Used Subfolders, add an entry named Textures that points to [shared network folder]:\Inventor\Styles\. It displays after editing the project editor pane as: Textures - Workspace\Textures.
- Copy the .bmp images to this folder.
Note: All .bmp images in this folder display in the Choose Texture dialog box, accessed from the Styles Editor.
- Set the Folder Options, Styles Library path to .\.
- Set Use Styles Library = Yes.
- Save the project file.
Step 2: Assign a custom texture to a color style.
- Open a new or existing .ipt part file.
- On the ribbon, click Manage tab
 Styles and Standards panel
  Styles Editor .
 - Click Color to display the current color styles.
- Select the color style you want to assign a custom texture to. For this example select Blue.
- Click Choose to assign a custom texture to the Blue color style.
- Select the Project Library option and select the textures folder.
- Select a texture.
Note: Refer to steps 2 -3 in Step 1.

Note: If you relocate the styles library folder, its subfolders and the texture files come with it.
- Right-click the edited color style (Blue) and select Save to Styles Library. Repeat steps 5 - 9 to assign custom textures to other color styles.
Step 3: Configure the read-only styles library project file for users.
- Open the Project Editor and switch to the project file where the users are going to work. Set the Folder Option Styles Library path to the styles library location defined by the administrator. In the previous example, the path specified is:[shared network folder]:\Inventor\Styles\.
- Under Libraries, add an entry named Styles that points to the same folder as defined previously.
Note: Enter the path in both places to provide access to the custom textures.
- Set the Use Styles Library = Read Only.
- Create a Frequently Used Subfolder named Textures and set it to (for example) [shared network folder] :Inventor\Styles\Textures. It displays as Textures: Styles\Textures after you complete the edit step.)
- Save and distribute the configured read-only project file to users.
