Drawing views
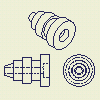 | On the Place Views tab, Create panel, use commands to place independent views in single multiview or isometric projections or place a view that captures the current orientation of the model. |
Highlights:
- To begin, create a base view of a model.
- Default settings and values in the Drawing View dialog box are defined in the current standard and can be changed by using Style and Standard Editor.
- Projected views are generally the first type of view created from a base view. The projected view command creates orthographic and isometric views from a base view. You can create multiple views with a single activation of the command.
- You can create a view of a model that contains only sketches. The sketch must be parallel to the drawing view.
- You cannot create additional views from a sketch created in the drawing.
- If you create a view of a part file that contains only surfaces, any surface that is set to Invisible in the part file, does not display in a drawing view. Only surfaces that are set to Visible display in the drawing view.
- After view creation, any surfaces in the corresponding part file that are set to Invisible no longer display in the drawing file.
- If the Enable Background Updates application option is selected, raster views are displayed until calculation of precise views is complete. For more information, see Work with raster views.
Which view types can be created in the drawing environment?
- Base view: the first view you create. Other views are derived from this view.
- Projected view: an orthographic or isometric view that is generated from the base view or any other existing view.
- Auxiliary view: a view that is projected perpendicular to a selected edge or line.
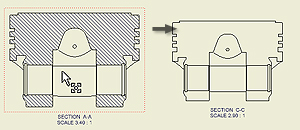
- Section view: a view created by sketching a line that defines a plane used to cut through a part or assembly. The view represents the surface area of the cut.
- Detail view: an enlarged view of a portion of another drawing view. Detail views are used to provide clearer, more precise annotation.
- Overlay view: a single view created from multiple positional representations. Overlay views show an assembly in various positions.
- Draft view: a view that contains one or more associated 2D sketches. It is not created from a 3D part.
Which operations modify views?
- Break: an operation which reduces the size of a longer model by removing or "breaking" irrelevant portions. Dimensions that span the break reflect the correct length.
- Break Out: an operation that removes a defined area of material to expose obscured parts or features in an existing drawing view.
- Crop: an operation that provides control over the view boundary in an existing drawing view.
- Slice: an operation that produces a zero-depth section from an existing drawing view.
Use Style and Standard Editor to set up the default properties of drawing views and view annotations.
The Standard style controls the view label defaults, display of threads, and projection type. To change the settings, click 
 then click the View Preference tab in the Standard panel.
When a section, detail, or auxiliary view is created, alphanumeric auto-indexing is used to generate the view identifier. The following characters are excluded from the indexing sequence by default: I, O, Q, S, X, and Z. You can customize the list of excluded characters on the General tab of the Standard Style panel.
The View Annotation style controls the text style for view labels and defaults for view annotation lines and arrows. To change the style, expand the View Annotation item in Style and Standard Editor, and select a View Annotation style from the list. Then edit the style and save the changes.
Right-click and use the editing commands to override the appearance of view annotations in the drawing.
When you place the first drawing view, Autodesk Inventor uses the sheet size and the overall size of the model to determine a reasonable view scale. The first view sets the default scale for subsequent views. You can accept the default scale or set a different scale.
If you change the view scale, the scale for dependent views on the same sheet updates as well. You can change the scale of a dependent view independent of its parent view.
The scale for dependent views on a different sheet is not automatically updated when the scale of the parent view changes.
Work with views on multiple sheets
When documenting large or complex models, it is often necessary to place a dependent view on a different sheet than its parent view. As you place a view, on the ribbon, click 
 . You can also drag views from one sheet to another in the browser.
When you place a dependent view on a different sheet than its parent view, a projection line is placed next to the parent view. In the browser, the dependent view is listed under its parent view with a shortcut icon. To display the dependent view, double-click the shortcut icon. There is also a shortcut to the parent view from the sheet that contains the dependent view.
To move a view, click and drag the red border. You can move multiple views with a selection window. Click in the upper right corner and drag diagonally from right to left, enclosing the appropriate views in the window, and then click again. Views that are fully or partly within the selection window borders are selected. Click and drag a red border to move the views.
You can also select multiple views by holding down Shift or Ctrl key as you select each view. Remove a view from the selection set by holding down the Shift key and selecting one or more views.
You can set the Suppress option for a drawing view to control whether the view is visible or suppressed.
The Suppress option provides a higher level of visibility control, which supplements the visibility control for components, annotations, model edges, and layer visibility. The Suppress attribute affects all model-generated geometry (visible and hidden edges, thread edges, tweak trails) and annotations attached to the selected view (view sketch, dimensions, symbols, centerlines). View visibility suppression is not provided for overlays and breakouts.
When importing models the data can sometimes be poor. You can create drawing views without cleaning up the data.
Cut inheritance in child views
- Isometric projected views created for section views inherit the section cut by default. Orthographic projected and auxiliary views support the inheritance of the section, but it is switched off by default.
- Isometric projected views created for views with a breakout inherit the breakout cut by default. Orthographic projected and auxiliary views do not support the inheritance of breakout operations.
- For orthographic projection, child views inherit breaks by default if the view projection direction is parallel to break lines.
You can create views of parts that contain only 2D or 3D sketches, but no solid bodies. 2D sketches are visible only in base views and must be parallel to the view.
When you create a view of a part file that contains only surfaces, any surface that is set to Invisible in the part file, do not display in a drawing view. Only surfaces that are set to Visible displays in the drawing view.
After view creation, any surfaces in the corresponding part file that are set to Invisible will no longer display in the drawing file.
Create views of sheet metal parts or iParts
To create a base view of a sheet metal model, click 
 on the ribbon. Then select the sheet metal file and set appropriate options on the Drawing View dialog box.
Two types of drawing views can be created for a sheet metal part or iPart: Folded model view and flat pattern view. The Flat Pattern option is available only if a flat pattern exists in the source file.
Highlights (Sheet Metal iParts):
- When you create a drawing view for a sheet metal iPart, you can select an explicit iPart member on the Model State tab of the Drawing View dialog box.
- If a flat pattern is available in an iPart member file, the Flat Pattern option is enabled in the Drawing View dialog box.
- To update an out-of-date iPart member, select the member on the Model State tab of the Drawing View dialog box.
- To reference a specific iPart member instead of Active Factory Member in a legacy drawing, edit the drawing view and select the member on the Model State tab of the Drawing View dialog box.
Create drawings with Memory Saving Mode
Memory Saving Mode instructs Autodesk Inventor to be more conservative with memory both before and during view computation at the expense of performance. It conserves memory by changing the way components are loaded and unloaded.
You can set Memory Saving Mode in the Drawing tab of the Applications Dialog box, and also on a per document basis in the Drawing tab of the Document Settings dialog box.
Display splines in drawing views
When you generate drawing views of models with spline geometry, now real spline curves are used in drawings.
The real spline geometry is used for newly created splines only.
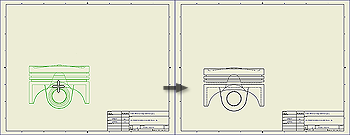
The first view in a new drawing is a base view. On the ribbon, click 
 to add additional base views to a drawing.
A base view is the source for subsequent views. A base view:
- Sets the defaults for child views.
- Can be used to create a projected view, an auxiliary view, a section view, and a detail view.
 |
|
 Show Me how to create a base view
You can create a projected view with a first-angle or third-angle projection, depending on the drafting standard for the drawing. You must have a base view before you can create a projected view. On the ribbon, click 
 .
.
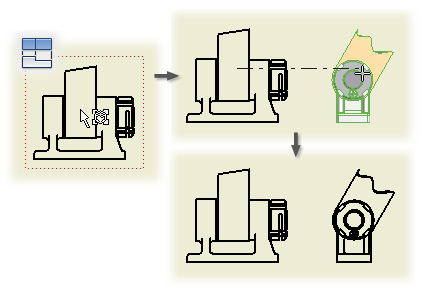
You can also create projected views immediately after you create a base view. Make sure the  Create projected views immediately after base view creation box on the Drawing View dialog box is checked. Click to place projected views.
The check box is disabled during edit.
Tips:
- Projection style: The projection type is controlled by the active standard. You can switch between first-angle and third-angle on the View Preferences tab of the Standard style. The change affects only the current drawing unless you save the setting to the style library. All other drawings that use that standard are updated with the changed projection.
- Cut inheritance in projected views: To switch on or off the inheritance of the section, slice, broken, or breakout cut, right-click the projected view, and select Edit View. Open the Display Options tab of the Drawing View dialog box, and select the appropriate options in the Cut Inheritance section.
On the ribbon, click 
 to create an auxiliary view by projecting from an edge or line in a parent view. The auxiliary view is aligned to the parent view.
The default style of auxiliary view annotations is set in the Style and Standard Editor.
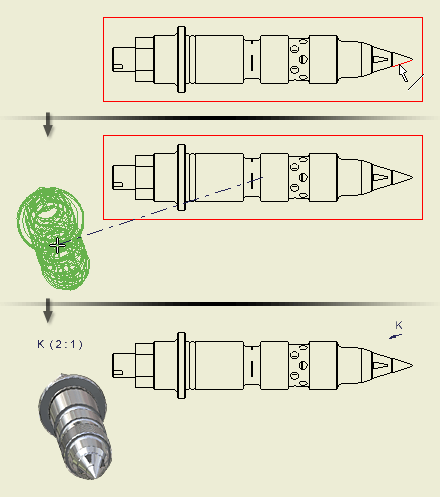
Once a base view has been placed on your drawing, all views projected from that view have the same view scale. You can change the view scale of any view after it has been created. If you regularly use a view scale that is not contained within the style you most frequently use, you can create a custom view scale within that style.
- On the ribbon, click

 .
. - In the left pane of the Style and Standard Editor dialog box, select the active drawing style (displayed in bold text).
- In the Preset Values group, select Scale from the dropdown selection list.
- Click New
- Enter a new scale in the Add New Scale dialog box.
- Click OK. The Add New Scale dialog box is dismissed.
- Click Save.
- Click Done. The Style and Standard Editor dialog box is dismissed.
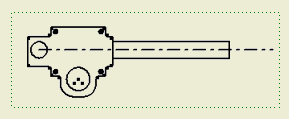
A draft view can be "empty" because it does not require a model representation and can contain multiple sketches. You can add a draft view to an existing drawing or create a drawing with a draft view containing AutoCAD data.
- To edit the view identifier, scale, or to change the view label visibility, select the draft view, right-click, and click Edit View.
- To edit the view geometry, select the sketch, right-click, and click Edit.
- To edit the view label in the Format Text dialog box, select the view label, right-click, and click Edit View Label.
- To edit the view label Text Style, select the view label, right-click, and click Edit Text Style.
Show work features in drawing views

You can recover work features from the model into a drawing view and use them as datum, associate annotations to them, and use them for other annotation tasks.
Set the style attributes for work features in the Object Defaults style for the active standard used by the drawing.
Automatically recover work features when creating views
When you place a drawing view, you can recover work features.
- On the ribbon, click

 .
. - In the dialog box, select the model file, view orientation, and other settings.
- Click the Options tab, and select Work Features.
Recover work features in existing views
If a view was placed without recovering the work features, you can use Include Work Features to recover them.
- Select the view components in the browser or the graphics window.
- Right-click the component, and select Include Work Features.
- In the Include Work Features dialog box, specify preferences about work features to recover:
- In Recovery Depth, specify if you want to recover work features from the selected component or the component and everything below it in the browser hierarchy.
- In State, specify if you want to recover visible work features, invisible work features, or both.
- In Type, select which user work features and origin work features you want to recover.
- Click OK to close the dialog box.
Change the visibility of individual work features in views
When you recover work features in a drawing view, they are always visible in the drawing, regardless of their visibility setting in the component.
Once you recover work features in a drawing, you can hide individual work features.
- Select the work feature in the graphic window or the browser.
- Right-click and select Visibility to clear the check mark to make the work feature invisible.
- To show invisible work features, select the work feature in the browser. Right-click and select Visibility to make the work feature visible again.
Exclude work features from drawing views
After a work feature is recovered, use the Include menu option to exclude work feature centerlines and center marks from the drawing.
- In a drawing view of a model with work features or in the browser, click to select work features, center marks, or centerlines. Or hold down the CTRL key and click multiple work features to select them.
- Right-click and click Include to clear the check mark. The selected work features are excluded from the drawing.
Browser representations of work features
Create a drawing view of a sketch
You can include consumed and unconsumed 2D and 3D sketches in drawing views, even if there is no solid body in the part file. Except for reference parts, a sketch node is created in the drawing browser using the default name of the sketch, such as 3D Sketch1:Model.
2D sketches are visible only in base views and must be parallel to the view.
In drawing views of parts that contain both solid bodies and sketches, the sketches are not visible by default. If the part file has no solid bodies, sketches are automatically visible in drawing views.
- On the ribbon, click

 . And open a file that contains only sketches or a mixture of sketches and solid bodies.
 - In the graphics window, click to place the view. If the part file contains:
- Only sketches, they are automatically included in the view.
- A mixture of sketches and solid bodies, sketches are not automatically included in the view.
- To add sketches to a view, right-click the sketch node in the browser and select Include. The browser icon changes color to indicate the sketch is visible.
- To change the visibility of a sketch in a view, right-click the sketch icon in the browser and select or clear the check mark of the Include option.
- Continue to add views as needed. The sketch visibility of the child view is determined by the visibility in the parent view.
What are some guidelines for using 3D sketches in drawing views?
In drawing views:
- Sketch dimensions are not visible.
- Sketch geometry is not included in hidden line calculations.
- Child views inherit sketch inclusion or exclusion from the parent view.
- Sketch nodes in the browser have no Properties option.
- Break-out, detail, and section views trim sketch geometry the same as other model geometry.
Tips:
- To move a view, click and drag the red border of the view.
- You can delete a drawing view or copy and paste a view to another sheet. Right-click the view, and select the appropriate operation from the menu.
- If you need to recover work features after you have created a view, right-click the model in the browser, and then select Include Work Features. In the Include Work Features dialog box, specify the type of work features you want to recover in the drawing view.
- Default settings and values in the Drawing View dialog box are defined in the current standard and can be changed by using Style Editor.
To edit a drawing view:
- In the graphics window or the browser, select the view.
- Right-click and select Edit View from the menu.
- In the Drawing View dialog box, on the Components tab, change the options related to the source model.
For assembly drawing views, you can also:
- Change an association of a view to a design view representation . Click the arrow to select a design view representation and select the Associative check box.
- If appropriate, select a different positional representation.
- For an iAssembly factory, select the member to represent in the view.
- Select a level of detail representation to improve view generation by using only unsuppressed components in the view.
- On the Model State tab, change the weldment state, reference options, or hidden line calculation options. Available options depend on the type of file used to create the view.
- On the Options tab, change attributes of reference data or display characteristics.
- Change the additional options:
- Select the view scale and edit the view identifier.
- Switch the visibility of the view label on or off.
- Click Edit View Label and edit the view label in the Format Text dialog box.
- Set the display style: Display or remove hidden lines and select shaded view, if appropriate.
- Choose OK to close the Drawing View dialog box.
- Right-click a drawing view in the Model browser or in the graphic window.
- In the menu, select the Suppress option.
Control the cut inheritance for child views
You can control if child views inherit the section, slice, broken, or breakout cut.
- In the graphic window or the browser, select the child view.
- Right-click and select Edit View from the menu.
- On the Display Options tab of the Drawing View dialog box, select the appropriate check boxes in the Cut Inheritance section. The selected cuts are inherited from the parent view.
- Choose OK to close the Drawing View dialog box.
Update drawing views and sheets
Create or edit drawings of iAssemblies
You can create views that reference an iAssembly member, but not the factory.
In addition to views, you can create a general table. The table can reference an iAssembly factory and contains all members by default. The table updates when changes are made to the factory table. For more information, see Create or edit a table formatted by the Table style.
Create a drawing view of an iAssembly member
- On the ribbon, click

 .
. - On the Components tab, browse to an iAssembly factory.
- Click member to select one of the listed factory members.
You can specify a factory member even if files were not generated (no file was created on disk).
- Add other data such as the scale, representation, and display style.
- On the Options tab, specify preferences for the view.
- On the drawing sheet, click to place the view and close the dialog box.
After you create a drawing view, you can change the referenced iAssembly member.
- Right-click the view and select Edit View.
- On the Component tab of the Drawing view dialog box, click the arrow on Member. Select a different member and click OK.
- The view updates to show the new member.
Copy and move views to a different sheet
- Sometimes you must place a dependent view on a different sheet from its parent view.
- As you place a view, click

 and then click the sheet.
 If you prefer, you can click the view in the browser and drag it to a different sheet.
- To copy a view, right-click the view, and select Copy. Click New Sheet and click to place the copy on the new sheet.
Or, you can right-click the view in the browser, select Copy, and then click the appropriate sheet. Right-click and select Paste.
Check in the browser to verify that the copy is placed on the new sheet. If it is not visible on the sheet, it may be "behind" another view. Click and drag the views to reveal it.
Views respond to deleted factory or member
A drawing view responds to a deleted iAssembly factory or member:
- A view that references a factory member does not change when the member is deleted.
- If all members are deleted from an iAssembly factory, it reverts to a regular assembly. Drawing views created from the members are unchanged.
- A view that references a regular assembly responds when the assembly is converted to an iAssembly factory. It automatically references the first member in the factory table.
Redefine XY planes to XZ planes
Default isometric view in Metric template
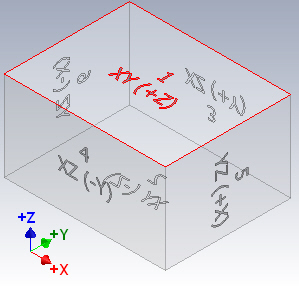 | To redefine an isometric view
|
Edits properties of drawing views. Specifies a model and setup for a base view.
| Access: | To create a view, click the Base command on the Place Views tab. To edit a view, right-click the view in the browser or the graphics window, and then select Edit View from the menu. |
Selects the source file and the representations to use in a drawing view.
File | Specifies the source part file to use for the drawing view. Click the arrow to select from the list of open files or click the drop-down arrow next to File. Select Open an existing file to browse for a non-vaulted file. Select Open from Vault to browse for a file in the vault. |
Representation: | |
View | Lists names of assembly design view representations. Select a view representation from the list. This option is available when the selected file is an assembly that contains defined design view representations. Select the Associative check box to update the drawing when changes are made to the associative design view representation in the assembly environment. |
Position | Selects a positional representation to show in the view. This option is available for base view creation. |
Level of Detail | Selects a level of detail representation to show in the view. |
Sheet Metal View | Available only when the selected model is a sheet metal file. Folded Model creates a view of the sheet metal folded model. Punch and bend annotations are not available for folded model views. Flat Pattern creates a view of the sheet metal flat pattern. Available only if a flat pattern exists in the sheet metal file. Recover Punch Center controls if punch centers are included in the view. Punch centers must be recovered to create punch notes or punch tables. Available only if Flat Pattern is selected. |
Presentation View | Available only when the selected file is a presentation document. Specifies the presentation view to use. To associate the drawing view with the presentation, select the Associative check box above the view list. |
Specifies weldment state and iAssembly or iPart member to use in a drawing view. Specifies reference data such as line style and hidden line calculation method.
Sets the display options for the drawing view. Select an option to add it to the view. Clear the check box to remove it from the view. Only those options applicable to the specified model and the view type are available.
All Model Dimensions | Associates model dimensions to the view. Select the check box to retrieve the model dimensions. Only those dimensions that are planar to this view and were not used in existing views on the sheet display. Clear the check box to place the view without model dimensions. If dimension tolerances are defined in the model, they are included in the model dimensions. |
Model Welding Symbols | Associates model welding symbols to the view. Select the check box to get the model welding symbols. Clear the check box to place the view without model welding symbols. |
Bend Extents | Sets the visibility of sheet metal bend extents in the view. Select the check box to display the bend extents. Clear the check box to hide them. |
Thread Feature | Sets the visibility of thread features in the view. Select the check box to display thread features. Clear the check box to hide them. |
Weld Annotations | Associates model weld caterpillars and end fills to the view. Select the check box to get the model weld annotations. Clear the check box to place the view without model weld annotations. |
User Work Features | Recovers work features from the model into the view. Select the check box to include the work features. Clearing the check box does not recover them. This setting is used only for initial view placement. To include or exclude work features in an existing view, expand the view node in the Model browser and right-click the model. Select Include Work Features and then specify appropriate work features on the Include Work Features dialog box. Or, right-click a work feature and select Include. To exclude work features from the drawing, right-click the individual work feature and clear the Include check box. |
Interference Edges | Enables the visibility of associated drawing views. When selected, associated drawing views are to display both hidden and visible edges that were previously excluded due to an interference condition (press, or interference fit conditions, threaded fasteners in tapped holes where the hole feature is modeled with the minor diameter). This option is enabled only when you edit or create drawing views of assembly or presentation files. |
Tangent Edges | Sets the visibility of tangent edges of the selected view. Select the check box to display tangent edges. Clear the check box to hide them. |
Foreshortened | Sets the display of tangent edges. Select the check box to shorten the length of tangent edges to distinguish them from visible edges. |
Section Standard Parts | Controls the sectioning of standard parts in the drawing view of assemblies. By default, Obey Browser Settings is selected. Section standard parts is Off by default in the drawing browser. The setting can be changed to Always or Never.
|
Show Trails | Shows or hides the trails in the selected view, when the source file is a presentation. |
Hatching | Sets the visibility of the hatch lines in the selected section view. |
Align to Base | Sets the alignment constraint of the selected view to its base view. When the check box is selected, an alignment exists. Clear the check box to break the alignment. |
Definition in Base View | Controls the display of detail circles, section lines, and their associated text. Select the option to display the annotations. |
Orientation from Base | Specifies camera orientation of a dependent view when base view is rotated or re-oriented. When selected, the dependent view inherits the new orientation from the base view. |
Cut Inheritance | Switches on and off the inheritance of a breakout, break, section, and slice cut for the edited view. Select the check box to inherit the corresponding cut from the parent view. |
View Justification | Sets the justification of the view. Click the arrow to select Centered or Fixed. |
Orientation | Sets the view orientation. Select a standard orientation from the list. The list is available only when you create a base view.
|
Places an auxiliary view by projecting from an edge or line in a parent view. The resulting view is aligned to the parent view.

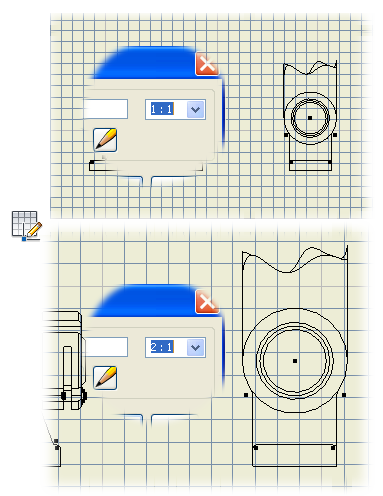
Sets the label and scale when placing or editing a draft view .
| Access: | On the ribbon, click To change the label or scale for a draft view, select the view in the browser or graphics window, right-click, and then select Edit View from the menu. |
View/Scale Label
Deletes all or selected drawing views.
| Access: | Select the view to delete, right-click, and then select Delete. |
OK | Click to delete the selected view and all of its dependents. Or, after selecting views to keep, click OK to close the dialog box. |
 (More) | Click to display a list of dependent views. All views are initially selected for deletion. Click a view to remove it from the selection list. |
Specifies the work features to recover in the view.
| Access: | For a view placed without displaying the work features, select the component in the graphics window or the browser. Right-click the component and select Include Work Features. |
Highlights:
- All work points are recovered.
- Work axes parallel with sheet normal are recovered as work feature center marks; work axes perpendicular with sheet normal are recovered as work feature centerlines.
- Work planes whose normal is perpendicular to sheet normal are recovered as work feature centerlines; work planes whose normal is not perpendicular to sheet normal are not recovered.
- Work features that have been excluded in the drawing are not recovered. Use Include to recover excluded work features.
- Work features cannot be recovered if Defer Updates is turned on.
- Work features cannot be recovered while in an active sketch. You must close the active sketch before you can recover them.
Recovery Depth | This Model Only includes only work features belonging to the selected model. This is the default setting. This Model and Model Hierarchy includes work features for the selected model and all dependent components, if applicable, and features. |
State | Specifies if you want to recover user-defined Visible work features, Invisible work features, or both. |
Type | Sets types of user-defined or origin work features to include. By default, all user work feature types are selected and all origin and UCS work feature types are not selected. Clear or fill the check box for the appropriate recovery intent. |
Part, Feature, or Edge properties
Changes the line type, line weight, and color for selected edge, feature or part to the value specified in the style or for the current document, overrides values set in the style.
Manages properties for view edges, symbols, feature and component selection priorities, trails, user-defined symbols, and sketch geometry.
Access: | Right-click on the edge of an object, and then select Properties from the menu. |
By Layer | Available only when the Select command on the Quick Access toolbar is set to either Feature Priority or Part Priority. Select the check box to show properties specified as By Layer. Clear the check box to set Line Type, Line Weight, or Color independently. |
Line Type | Specifies how a line or type of curve is displayed. Set to By Layer to inherit the line type specified for the layer. NoteTo load an AutoCAD .lin file, select Other from the bottom of the Line Type list. For more information, see Select Line Type (LIN file). |
Line Weight | Specifies the thickness of the line type. Set to By Layer to inherit the line weight specified for the layer. |
Scale | Available only in a drawing sketch. Changes the scale of the selected line type. Enter scale size in the text box. |
Color | Sets the line color for the line type. Set to By Layer to inherit the color specified for the layer. |

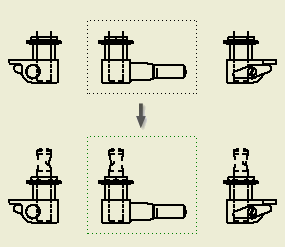




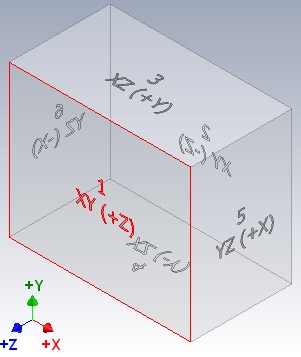
 Click Change View Orientation to specify a custom orientation in the Custom View window.


 Displays hidden lines in the view.
  Removes hidden lines from the view.
  Displays shaded model in the view.


